Tag Archives: T-55

Revell 1/72 T-55A/AM with KMT-6/EMT-5 (03328) Build Review

I begin by assembling the lower hull tub which comprises five parts. Fit is great.

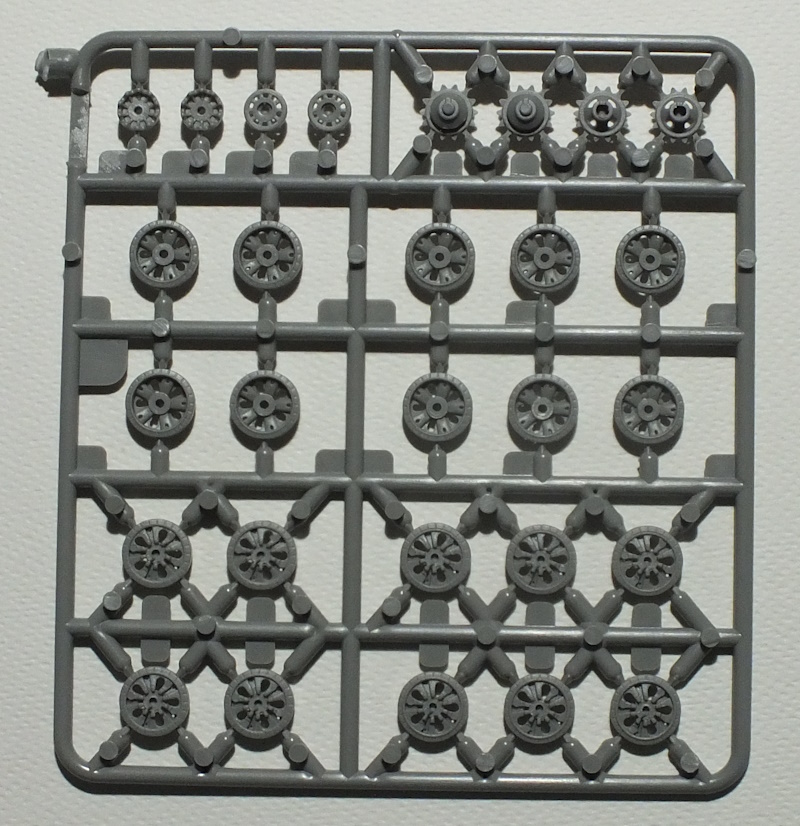
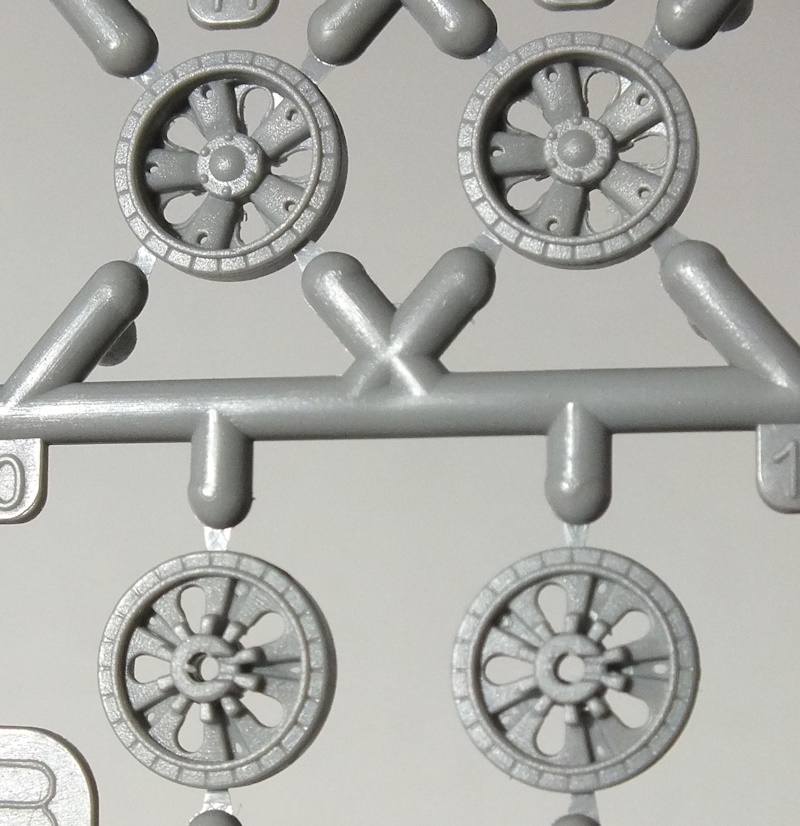
I paint and add the roadwheels, idlers and sprockets. The roadwheels are a fairly loose fit on the spindles and some care is required to get everything to line up. On the T-55, its torsion-bar suspension means that the roadwheel arrangement is asymmetric, with the roadwheels on the left being set notably further back than those on the right. It’s good to see that accurately modelled here.   

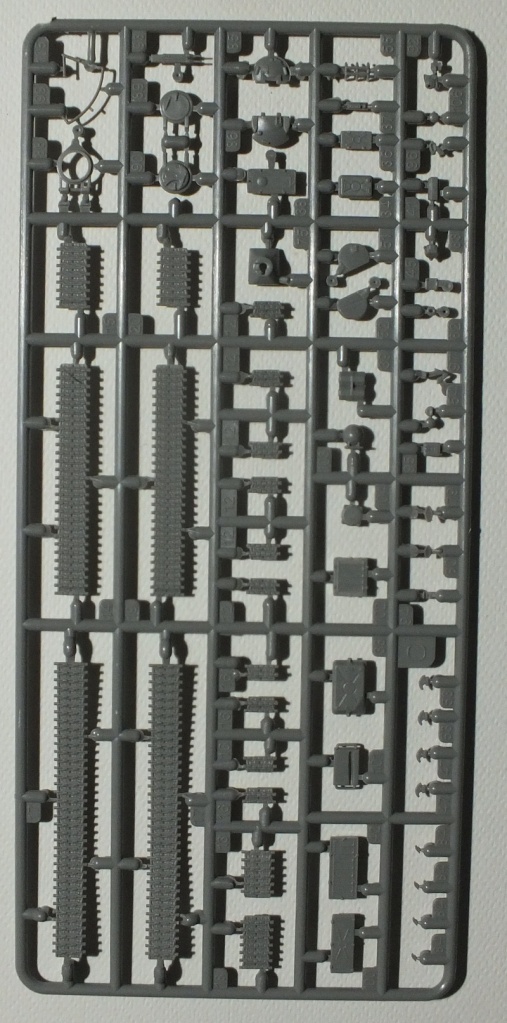
Then I add the tracks. And I’d have to say that these are probably the simplest and most straightforward link-and-length tracks I have tried. Fit is good, they assemble precisely as per the instructions with no need to bodge or cut out links and when they’re done, they don’t look bad. Top marks to Revell! And I do appreciate the ability to completely finish and paint the running gear before starting work on the rest of the kit.

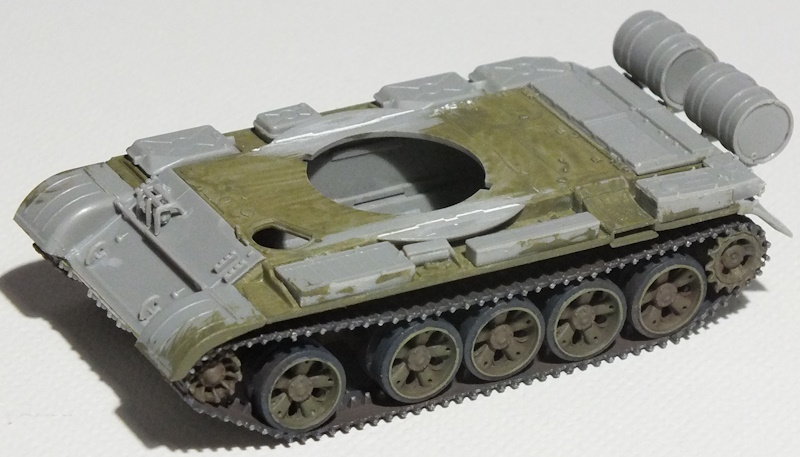
Then, it’s on to the upper hull. There are lots of parts to be added. A little filler is needed to smooth the join where the semi-circular fillets join the sides, but otherwise fit and location of the main parts is great.

Then I join the upper and lower hull and add the rear mudguards and the forward halves of the rear fuel tanks. Fit is great and no filler is required.

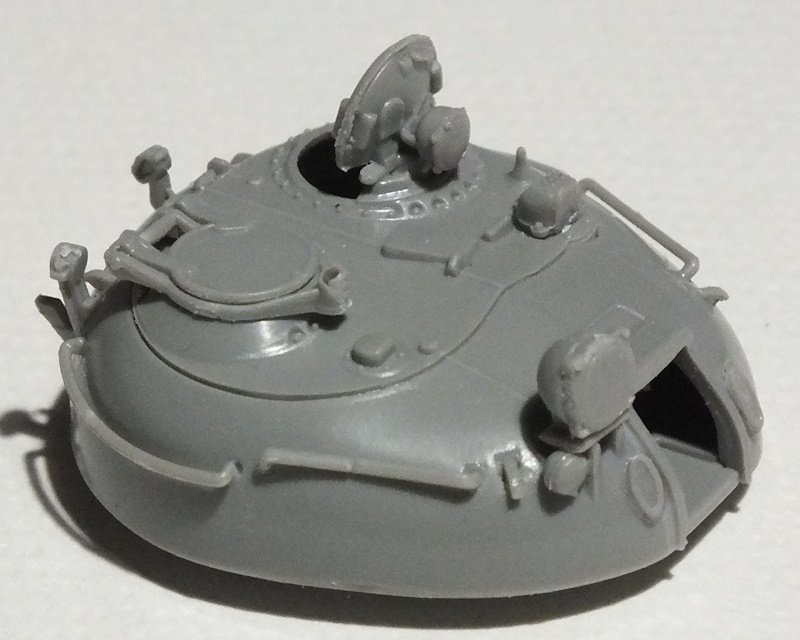
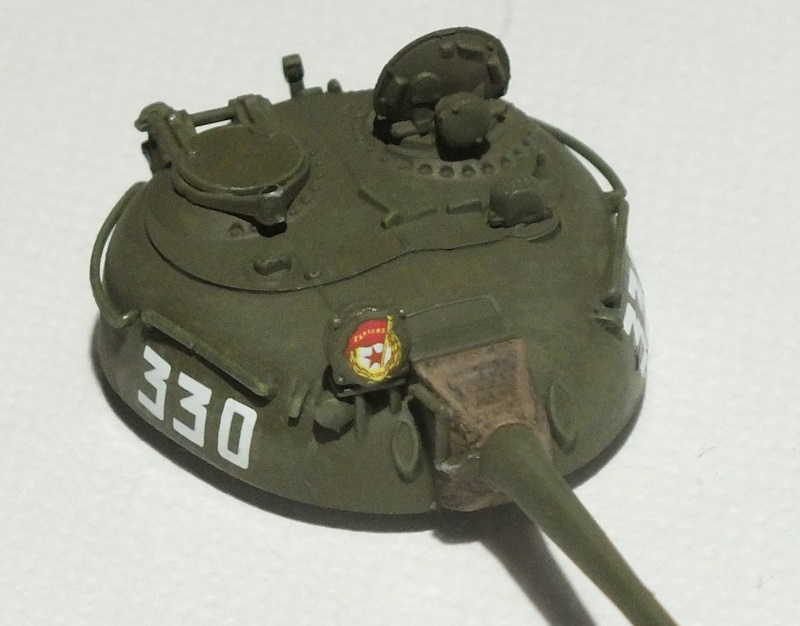
Next, the turret. There are some fairly tiny parts here, but everything locates well and fits nicely. I’m using parts appropriate for a Soviet T-55M here, as I did with the rear deck on the hull. The instructions don’t talk about these alternate parts at all (they only show the parts needed to build a T-55AM), but I was able to find an online scan of the instructions for the original Revell T-55M/AM kit, and these explain what’s needed and what should be left out.  

Then the hull and turret gets several thinned coats of green and some dry-brushed highlights. I have also added some colour variation to the base green, though it isn’t obvious in the image below.

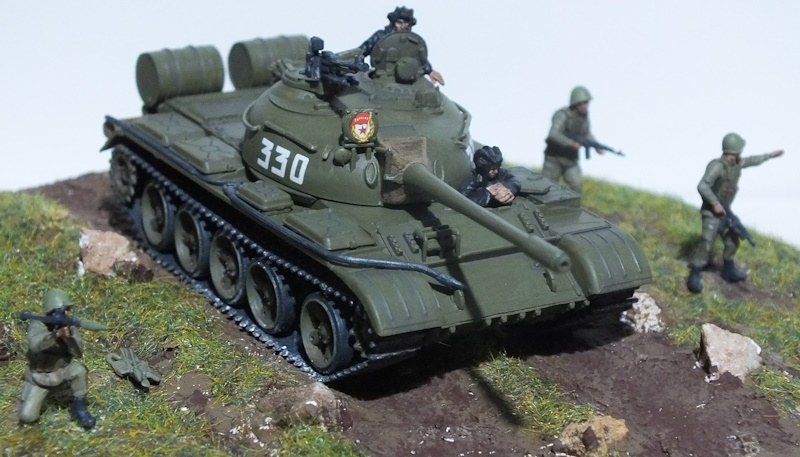
Then I add decals from the spares box for a tank of 6th Guards Tank Division in 1975.

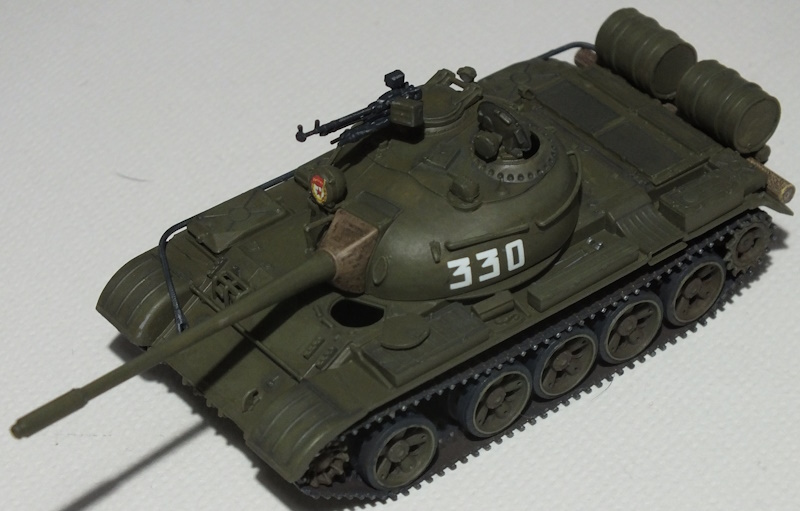
I add the turret MG, the tow cables and the unditching log and other parts on the rear hull and then I give everything a coat of varnish and a dark grey wash.

Normally, that would be the build close to finished but this time, I want to try to make a simple diorama base on which to display the finished kit. I want to include figures, both crew and infantry, and I was surprised at just how difficult it is to suitable Cold War figures in 1/72 and at a reasonable price. There are plenty of appropriate 3D printed and resin figures but most cost considerably more than I paid for this kit! In the end, I settled for two low-cost packs of figures. The infantry figures come from the Zvezda Soviet Motorized Infantry set, part of their Hot War wargames range and first released in 2013.

This is more like a mini-kit than traditional soft plastic 1/72 figures. It includes just five figures moulded in hard plastic with separate limbs and weapons.

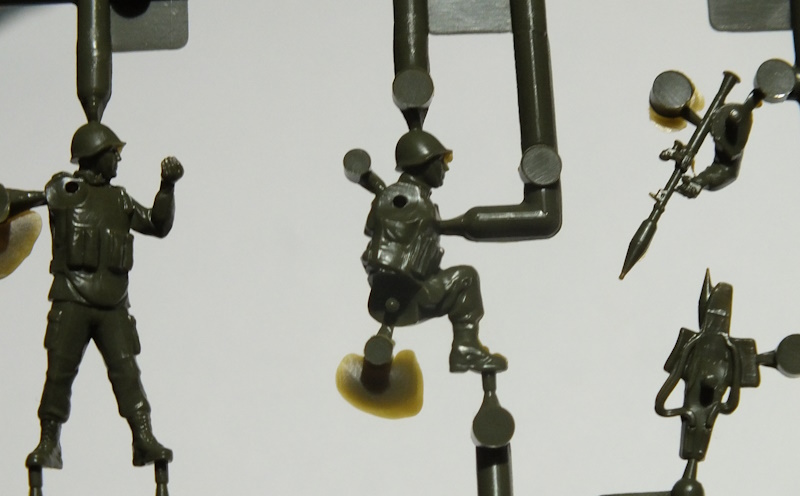
The second set is HaT WW2 Russian Tank riders and this is a more traditional set of 44 soft plastic figures first released in 2011.

I want the seated infantry figures for my next kit, but this boxing also includes tank crew figures. These are World War Two figures wearing late-war tanker’s uniforms but in 1/72, IMHO, they’re close enough to pass for figures from the 1970s.

With the figures sorted, it’s time to consider the diorama base. OK, I know, you can buy lots of ready-made dioramas and display bases, but where’s the fun and challenge in that? I’m using a circular wooden kettle stand, purchased at my local Chinese Bazaar for a mighty €1.50.

The first step is to use filler to build up something that will hopefully look a little like a portion of dirt track passing through a grassy meadow in East Germany in the 1970s. Before adding the filler, I covered the top of the base with a layer of PVA glue to help bond it to the base.

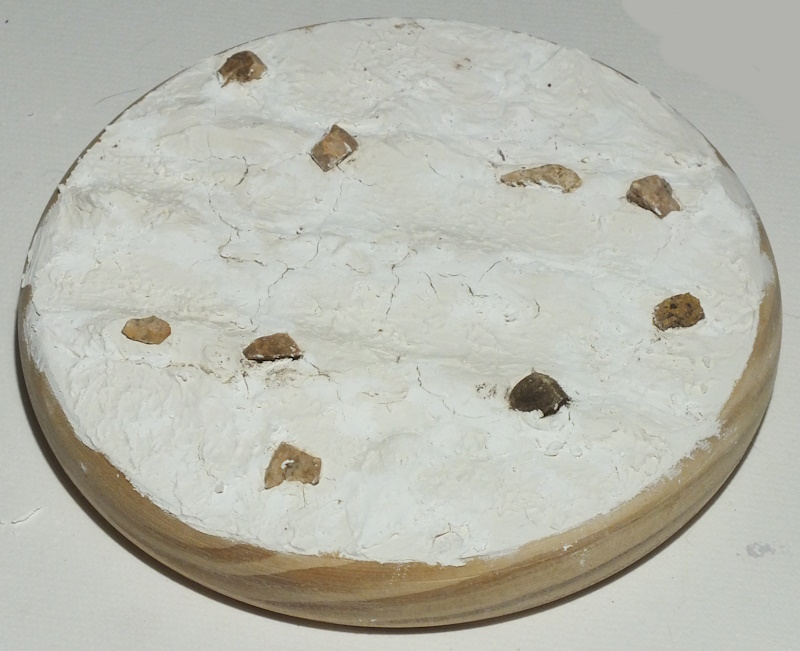
Then it gets painted.

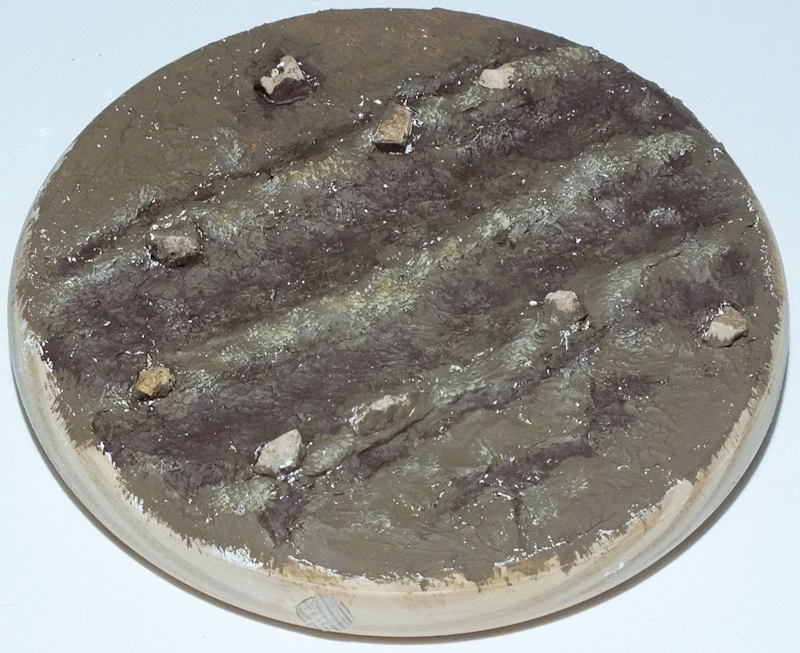
And finally I paint the edges of the base and add some of this stuff.

It’s easy to use – you just paint the areas where you want grass with PVA glue and then sprinkle it on and shake off the excess.

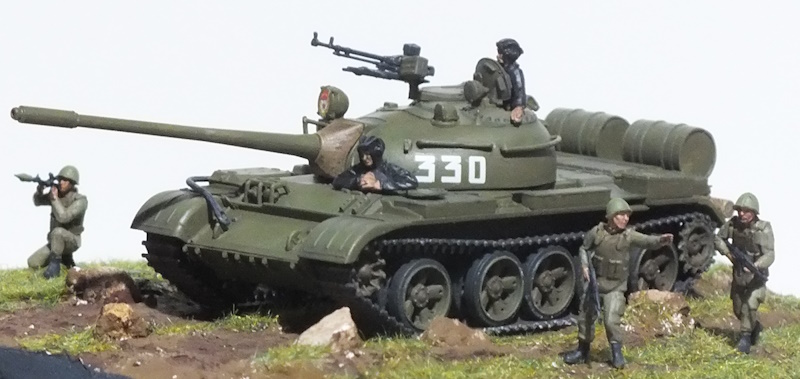
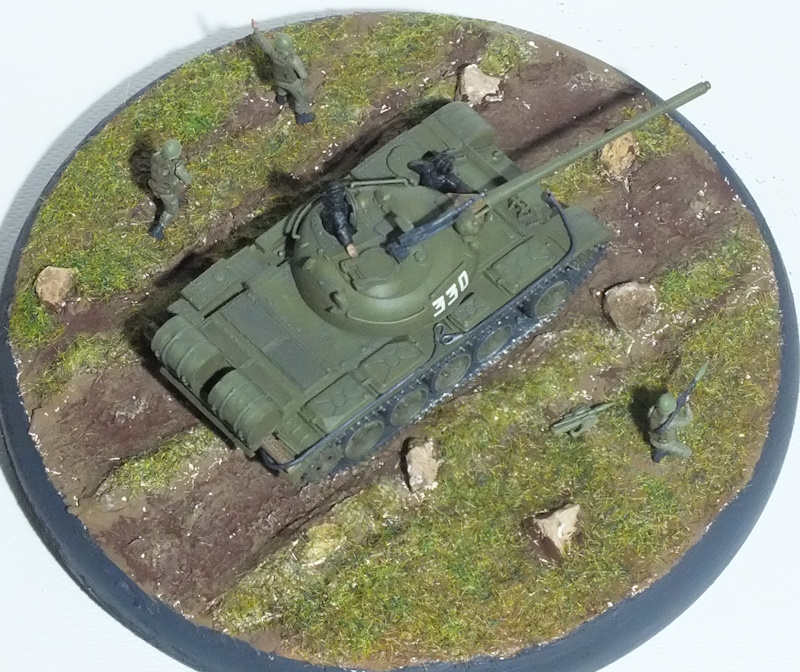
Then I add the tank and figures to the base and it’s done.

After Action Report

Producing kits that have sufficient detail but aren’t tricky to build can’t be easy. I certainly appreciate good detail, but I don’t enjoy a fiddly build. For me, these Revell 1/72 armour kits really get the balance right. They’re reasonably priced, mould quality is good, fit and location are excellent and detail is pretty good, but there’s nothing here in terms of construction that’s frustratingly difficult.  Just like the other Revell 1/72 kits I have tried; I enjoyed this build and I think it looks OK when it’s done.

Attempting a diorama base was fun. Just like the seascapes I have done; this was a different sort of challenge. It’s far from perfect (it would have been better, for example, if I had added some shrubs or bushes, just to give it more height variation), but I did learn from the experience and I’m planning another home-made diorama with my next armour kit.

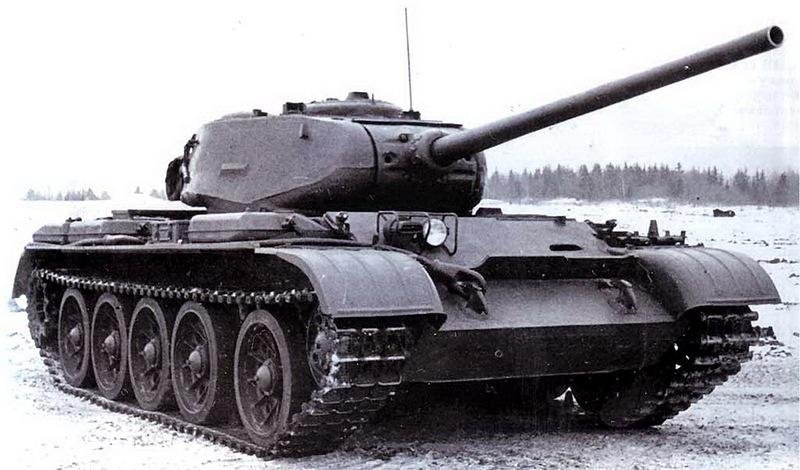
I think that the figures add to the diorama. Although this is a relatively recent release, the HaT crew figures are old-fashioned soft plastic figures, and detail isn’t the best. The Zvezda hard-plastic figures are much better detailed and they assembled without any problems. Overall, I enjoyed this build. And that’s why my next kit will feature the T-55’s predecessor, the T-34 on another diorama base. But this time, I’ll be building a kit that’s almost 50 years old…

Related Posts

Revell 1/72 T-55A/AM with KMT-6/EMT-5 (03328) In-Box Review and history

Revell 1/72 PzKpfw IV Ausf. H (03184) Build Review

Revell 1/72 T-34/85 (03302) Build Review

Revell 1/72 T-55A/AM with KMT-6/EMT-5 (03328) In-Box Review and History

I have built several Revell 1/72 armour kits over the last couple of years and I really like them (you’ll find links to other reviews at the end of this article). They’re widely available for relatively little cash, adequately detailed, generally accurate and most include link-and-length tracks. So when I had a hankering for building a post-war tank, this Revell T-55 was the obvious choice.

This kit was first released in 2016 and then re-released with additional parts the following year. The version I’m reviewing here was released in 2020 and comprises the original kit plus the parts required to add the KMT-6/EMT-5 mine clearing equipment. All T-55s were provided with fittings for this additional equipment which could attached or removed as required.

Will this be as good as the other Revell 1/72 armour kits I have tried? Is it a good depiction of the iconic T-55? We’ll take a look inside the box in a moment but first, let’s take a brief look at the history of what is said to be the most-produced (and most destroyed in combat!) tank in the history of warfare…

History

Work on a successor to the T-34 began during World War Two and led to the T-44 Medium Tank, with improved armour and better performance due to lighter weight and a new engine. But the T-44 didn’t offer a notable advantage over the late-war T-34/85 and this tank wasn’t built in large numbers or ever used in combat. When the Soviet Union began post-war development of an entirely new Medium Tank, the designers started with the T-44.

The T-44

The new design was completed before the end of 1945 and it featured a low hull with a steeply angled glacis plate. Early versions had a similar turret to the T-44 but this was quickly replaced  with a rounded, cast turret similar to that fitted to the IS-3. Armed with a 100mm DT10 main gun, the new tank, identified as the T-54, entered service in 1948 and was, at the time, one of the most potent and effective tanks in the world.

A Czech T-54. One of the few obvious visual differences between this and the T-55 is the large ventilator hood on the turret roof, in front of the right-hand hatch. This ventilator wasn’t provided on the T-55.

Improvements were made to the T-54 during its long service life and these culminated in the T-55, introduced in 1959 and incorporating a number of refinements including the provision of a full NBC (Nuclear, Biological, Chemical) protection suite. Many existing T-54s were subsequently upgraded to T-55 spec., which is why this family of tanks is often referred to as the T-54/55.

A Polish T-55AM with rubber side-skirts and additional armour on the turret cheeks

Like its predecessor the T-34, the T-54/55 was a rugged, effective and relatively unsophisticated design, but it was also cheap to produce. That’s why so many were built (estimates vary from 20,000 – 60,000) and why it was used not just by the Soviet Union and other Warsaw Pact nations but was also purchased by the armed forces of many other countries looking for a low-cost but effective Main Battle Tank. As a result, the T-55 has seen combat in the Balkans, the Middle-East, Africa, SE Asia and in the Persian Gulf and remains in service with many armies around the world.

A North Vietnamese T-54 during the fall of Saigon in 1975

The T-55 was built not just in the Soviet Union but in other locations including Czechoslovakia and Poland (and a licence-built version, the Type 59, was also built in China). Tanks built in different locations had detail differences and the T-55 was subject to almost continual upgrades during its long service life meaning that there are a bewildering number of variants and models. The versions depicted in this kit, the T-55M/AM, were produced in the 1970s and 1980s and involved several upgrades to armour, fire control systems and to the engine with the T-55M being an upgrade to the original T-55 and the T-55AM being an upgrade to the subsequent T-55A.  

What’s in the Box?

The parts here are provided on six sprues moulded in grey plastic.

The roadwheels look to be accurate and sharply moulded with a rough casting texture on the outer set.

The link-and-length tracks also seem to be adequately detailed, inside and out.

Small parts such as the tow cable and cupola-mounted machine gun are sharply moulded, in-scale and have reasonable detail. All the hull and turret hatches are provided as separate parts and the turret hatches have internal detail, but no figures are provided, which seems like a missed opportunity.

No slide moulding seems to have been used here, but the tip of the main gun is a separate part that is moulded open, so you won’t need to drill it out. One thing that’s a little disappointing is that the turret is completely smooth, with no hint of the sort of rough casting texture provided on the hull sides and roadwheels.

The instructions don’t mention it, but there are also a number of optional parts provided here. For example, there are two alternate glacis plates, both with angled mudguards, one with and one without the mounting for the KMT-6/EMT-5 mine clearing equipment. So, you could build this as a T-55AM with or without the mine clearing stuff.

However, there is also a third alternative glacis plate, with straight mudguards and a number of other optional parts (hatches, turret tops, and rear deck parts) that mean you can also model this as a T-55M. Below – T-55AM turret top (left) and T-55M turret top (right).

Decals are provided for just two tanks, both T-55AMs of the East German Army.

Suggested colour schemes, as you’d guess for a Warsaw Pact tank, are all-green.

Would You Want One?

People who know far more about the T-55 than I ever will claim that this kit represents a Czech-built T-55 (which would not have been used in Soviet service), that the turret shape isn’t quite right and that the tracks are appropriate only for the AM version. Thus the markings provided for East German T-55AMs here make sense. But I’d like to build this as a Soviet T-55M without the mine-clearing equipment. Alternate parts are provided here that allow this, though I’ll have to accept that the tracks aren’t entirely correct and that the turret also isn’t spot-on. However, the differences and issues look relatively minor to me and I think I can live with them. I’ll also have to find suitable decals for a Soviet tank.

If you want to build this straight out of the box as an East German T-55AM with or without the mine-clearing gear, it’s reasonably accurate, though most references suggest that the AM version was generally provided with rubber side-skirts that aren’t included here and the light guards and turret rails are a little over-scale. So, this isn’t a bad effort at producing a 1/72 T-55M/AM, though it isn’t perfect. If you don’t fancy this one, then there are options in 1/72, though not as many as you might expect for such a widely-used tank.

Italeri offer a T-55A (7081) in 1/72, and this is a new-tool kit released in 2020. It looks pretty good in terms of accuracy and detail and includes hard plastic tracks and a detailed engine with openable engine covers. Trumpeter released a 1/72 T-55 M1958 in 2008 and it isn’t bad, though some of the detail on things like the roadwheels and the rear deck doesn’t look quite right, it lacks some detail (it doesn’t include light guards or tow cables, for example) and it comes with nicely detailed but unglueable vinyl rubber-band-style tracks.

British company Plastic Soldier Company did produce a kit of the T-55, though I’m not sure it’s still available. These were quick-build models intended for wargaming (three were included in each pack) and while they weren’t bad, they didn’t include a great deal of detail particularly in terms of the tracks and running gear. And that, as far as I know, is the lot if you want to build a 1/72 T-55.

Related Posts

Revell 1/72 T-55A/AM with KMT-6/EMT-5 (03328) Build Review – coming soon

Revell 1/72 PzKpfw IV Ausf. H (03184) In-Box Review and History

Revell 1/72 T-34/85 (03302) In-Box Review and History