

Construction begins with the lower hull. No problems, no fit issues and no need for filler.

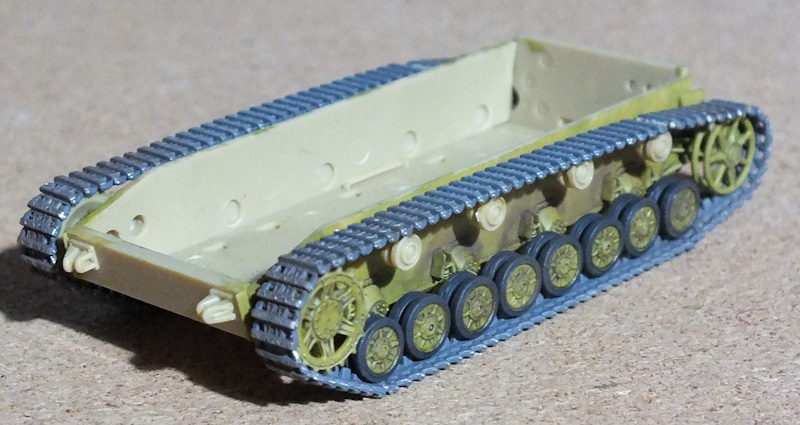
Now it’s time to start work on the tracks. I begin by preparing two short lengths made up of single links and, before the glue has fully set, bending these to fit the sprockets and idlers.

I then complete the track runs on both sides.

There is a minor issue. I followed the guidance in the instructions as to how many single links to use on the sprocket and idlers. However, when you bring everything together, the whole assembly seems to be around half a link too long. I have decided to trim the tracks at the upper join, above the rear return roller as this part of the track will be hidden by the track-guards and Schürzen side armour. This is what I end up with.

I have to say that when I looked at this kit in the box, I was more than a little nervous about the very small single links provided here. In the event, they went together very well. In fact, I’d say that these are probably the best engineered link-and-length tracks that I have come across. Each section and link positively engages with the next, making assembly much easier than it might have been and significantly reducing the risk of wonky tracks. I then paint and assemble the tracks and running gear. The gap above the rear return roller where I cut out half a link is very obvious here, but hopefully it won’t be visible on the finished model.
I then complete basic upper hull construction. No problems here and everything fits nicely.

The upper hull is then fixed to the lower hull, and everything lines up and no filler is required.
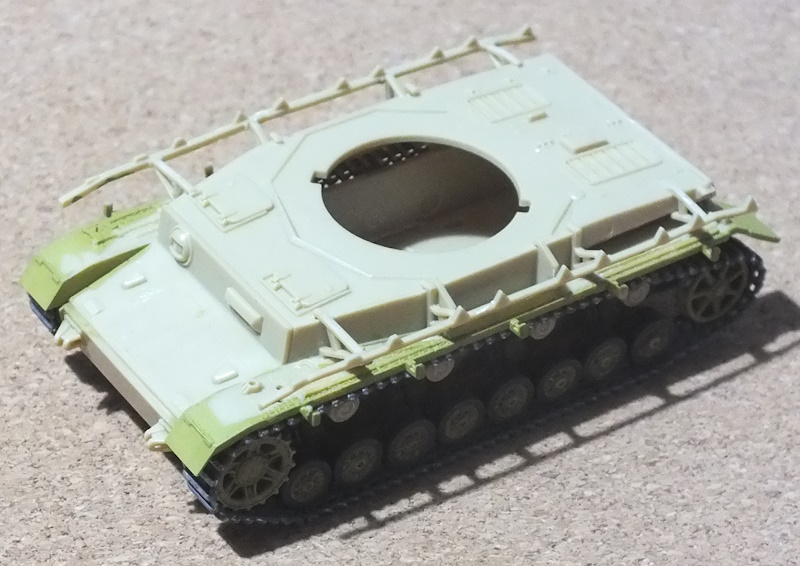
Next, the turret. Basic construction is straightforward and no filler is needed.

The completed turret, apart from the Schürzen armour which I’m leaving off until painting is complete.

A quick check shows that the turret seats nicely on the hull.

Then, it’s on to painting. First, everything gets several thinned coats of Vallejo Dark Yellow.

Then I add the green/brown camo scheme, using Vallejo Russian Uniform and Flat Brown and following the guidance in the instructions.

Then I add the decals and give it all a coat of varnish before adding a brown oil wash and a dusting of pastels which all helps to tone down the contrast between the colours used in the camo scheme as well as emphasizing shadows.

Then I add the tools, tow cable, exhaust and other bits and pieces to the hull.


Finally, I add the Schürzen armour plates. The armour on the hull fits with no problem at all and small locating pieces on the armour plates help to make sure everything is accurately positioned. The turret armour is much more fiddly. There are five parts and getting them all in position and lined up on the flimsy mountings takes a bit of work. With the armour in place and a dusting of pastels on lower surfaces to represent dust, this Panzer IV is done.


After Action Report
This is simply a cracking little kit. Everything fits and I didn’t use any filler here at all. Construction is straightforward other than getting the turret armour in position. Even the length-and-link tracks assemble easily, mainly due to the fact that each individual part is sharply moulded and locates positively with the next. This was built straight out of the box other than for drilling out the main gun and exhaust.

I like the way that Revell have modelled the Schürzen armour plates here. From most angles, you really can’t see that the plates are thicker in the centre and the result is plastic armour plates that do look convincingly thin. Of course, this isn’t perfect, but then I’m not sure that there is such a thing as perfect model kit. It would have been nice if all the tools were separate parts and the Schürzen mountings are thicker than they should be. However, given their complexity, I really wouldn’t fancy trying to recreate them in, for example, PE strips.

But these are minor niggles. Overall, this is a well-designed, sharply moulded kit that builds (as far as I can tell) into a decent model of the Panzer IV Ausf. H. It’s not often that I can recommend a kit without reservation, but in this case, I can. For not a great deal of cash, this is a great kit of one of the most widely-used German tanks of World War Two. If you want to build a small-scale Panzer IV, make it this one!
Happy model building.
Related Posts
Revell 1/72 PzKpfw IV Ausf. H (03184) In-Box Review and History

Great transformation from sprue to build.
LikeLike
Thanks!
LikeLike