

I start with lower hull construction, and it isn’t too tricky, though you do have to be careful to get the sloped sides at the right angle – checking the fit with the upper hull is a good idea. There is a small gap where the front armour plate attaches to the lower hull, but this will be filled and won’t be visible on the finished model.

I’m planning to build this by assembling and painting the running gear and lower hull and then adding the tracks before I attach and paint the upper hull, so I start by test-assembling the running gear, and that wasn’t a great deal of fun. Spindles on the suspension assemblies locate into holes in the roads wheels and spindles on the idlers and sprockets locate into holes on the hull. The problem is that all the spindles are a very tight fit in the locating holes, so much so that I was concerned that I’d snap something, so I drilled out the holes.
At that point I discovered that the sprockets, idlers and roadwheels just don’t line up – the roadwheels and idlers are closer to the hull than the sprockets. That’s going to be a major problem when trying to assemble the link-and-length tracks, so I installed plastic-card spacers to move these around 1mm further from the hull. It looks messy here, but hopefully all of this will be hidden by the roadwheels and idlers.
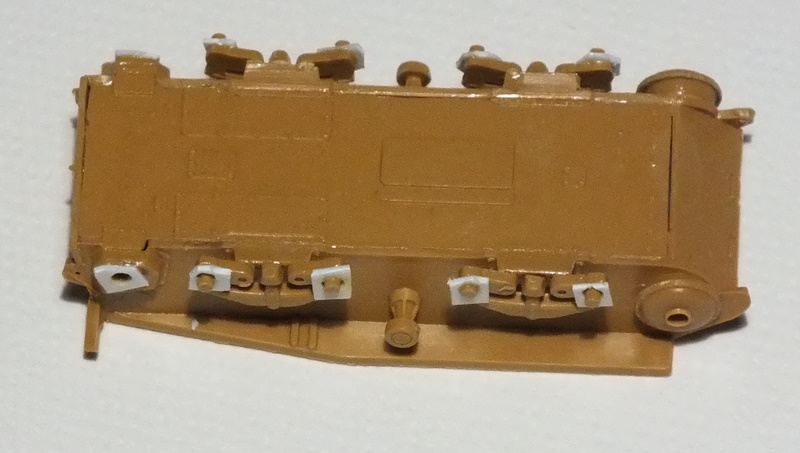
Then, I painted the roadwheels, idlers and sprockets and glued them in place. Normally, I leave the sprockets loose when I’m doing this type of track, but before drilling, they were too tight and now they’re a little loose, so I get everything in place, lined up and painted before I begin work on the tracks. I have decided that I want to model this as a beaten-up and well-used Hetzer finished only in dunklegelb, so no camo colours are added. There are just four fairly large roadwheels per side here, and you’d imagine that getting these, the sprockets and idlers aligned would be simple, but you’d be mistaken. The suspension units on to which the roadwheels fit aren’t perfectly straight and it takes a lot of fiddling on both sides to get running gear that looks even close to straight and aligned. Painting the roadwheel tyres is also a challenge because they are very thin and there isn’t a clearly defined lip between the wheels and tyres. That’s accurate, but it does cause some frustration while painting.

The tracks themselves are fairly standard link-and-length type, and the only issues are the tiny size of the individual links and the fact that there is no positive engagement between links or sections of track – all are simply butt-jointed to the next piece, making it challenging to get straight runs and giving a very fragile end result. I started with assembling and fixing in place the top run of three sections, then I added the nine single links to the sprocket and nine links on the idler (though the instructions say eleven).

Finally, I added the lower run comprising three sections and three individual links. A few spare individual links are provided, which is a good thing because these are fairly brittle and I lost two or three that cracked in half as I was cutting them off the sprue. By the time I had finished, I had just one spare link left over…

It takes way longer than you’d expect to get the running gear and tracks completed, and the finished result is pretty rough – the problem is getting those tiny individual links lined up and with regular spacing. Then, when it’s finally complete, it’s time to start work on the other side…

With both sets of tracks finally done apart from touching-up the paint, it’s time to move on to the rest of construction. I begin with joining the muzzle to the barrel of the main gun. At least that’s bound to be easy, after all, it just involves joining two bits of plastic. Well… The muzzle section seems to be of a slightly larger diameter than the barrel, which means it’s tricky to get it on straight and that sanding and filling is needed to smooth everything out. It was only when I looked closely at the image below that I spotted that there is still a gap on the underside at the join and that the top of the muzzle needs more sanding. I swear that if my eyes were capable of the same resolution as my camera, I’d probably just pack in model building altogether..

After more filling sanding and squinting, I get something approaching a barrel of uniform diameter and install it and the mantlet in the upper hull.

Then I join the upper and lower hull. Happily, fit is pretty good and only a tiny amount of filler is required on the join of the front and rear hull plates.

As you can see, I’m building this with hatches closed, mainly because I don’t care for the supplied crew figures. I add most of the bits and pieces to the upper and rear hull, leaving off the exhaust, machine gun, tools and spare track links which will be painted separately and added later. The side armour plates are rather thick, and this might look better with these replaced by thinner parts, but I want to see how this will look built out of the box so I leave them as they are.
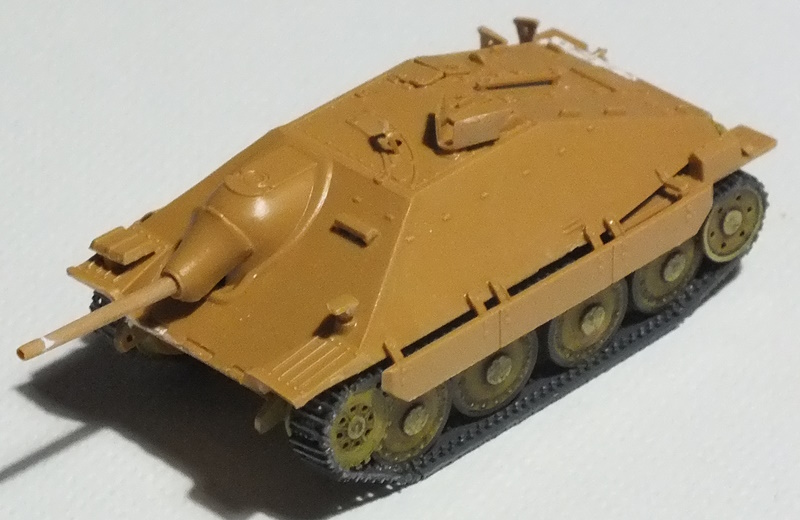
It’s time to begin painting the hull. First it gets a coat of Vallejo Dark Yellow, then some dry-brushed highlights and areas of paint chipping are added.

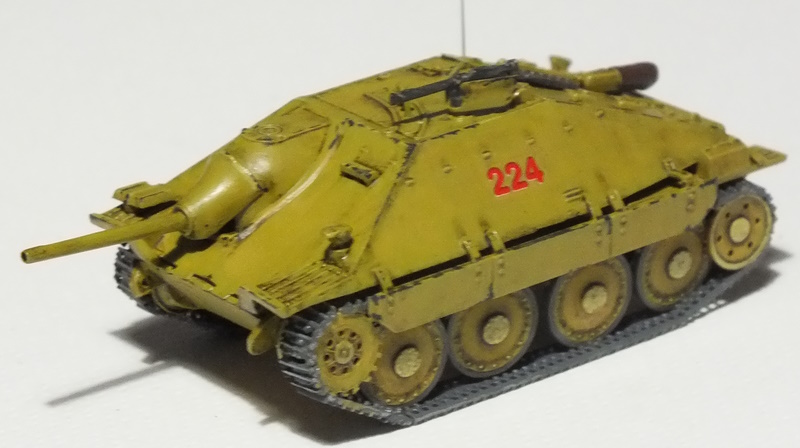
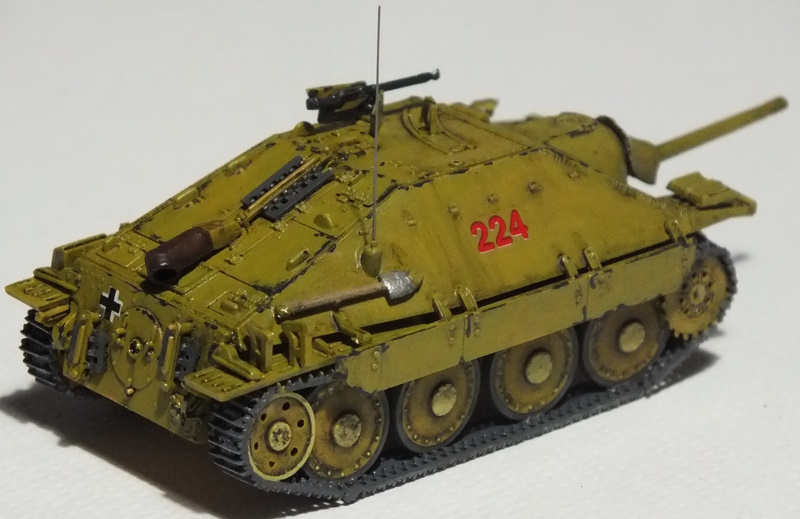
Then I add the decals. Given that there are just three, it doesn’t take long. I have also added the spare track links, exhaust, shovel and machine gun. I also added one part that isn’t provided here – the radio antenna base. A mounting hole is provided on the right rear hull in the correct place, just above the blade of the shovel and this part is shown on the box art and on the colour scheme views, but for some reason, it isn’t included in the kit. The instructions simply suggest placing a “stripped sprue” antenna into the hole in the hull. Instead, I add an antenna base from the spares box.

Next I add a brown oil wash to dirty everything up and deepen shadows and then add a stretched sprue antenna, that’s this tiny Hetzer done.


After Action Report
This isn’t a straightforward kit to recommend. There are certainly a number of problems. The running gear and tracks are really, really fiddly to do, fit isn’t always great and there are things missing including the radio antenna base and ammunition drums for the MG 34. The side armour is too thick, the shovel handle is too fat, the decals are printed slightly out of register and getting the muzzle on to the main gun barrel without a visible join takes way more time and effort than you’d expect.

But, there’s the thing: despite these issues, this does build up into a pretty reasonable small-scale representation of the Hetzer. It captures perfectly the squat, purposeful look of the original and, if you don’t look too closely, the finished tracks look OK and probably better than rubber-band style tracks. The main surprise here is just how tiny the completed kit is. Here it is next to a 1/72 Jagdpanther and as you can see, it’s barely as tall as the engine deck on the Jagdpanther!.

If you’re willing to put in the effort and to accept the limitations of a 1974 kit, you may enjoy this a great deal and you should end up with a reasonable representation of the Hetzer in 1/72. Just make sure you adopt the correct Zen mindset before tackling those tracks!
Related posts
Italeri 1/72 Jagdpanzer 38(t) Hetzer (7057) In-Box Review and History

looks great. you did a great job with the tiny tracks!
LikeLike
Thanks!
LikeLike